
Running LM Studio + Open WebUI = Local ChatGPT server at home (Ubuntu 24.04 LTS)

When using online LLMs served by ChatGPT (OpenAI), CoPilot (Microsoft), or Gemini (Google), you don’t know exactly what data is collected. All questions that you are asking on these platforms can be collected and used for all kinds of purposes. Not using these platforms these days is almost impossible, especially as a software developer. But there are alternatives.
One of the alternatives is running LM Studio in combination with Open WebUI. This is a powerful combination to serve everyone on your home network with a so-called 'local ChatGPT' where you can run several LLM models, like Qwen, Gemma, and Llama, to name a few.
In this article, we will explain how to install and configure LM Studio and Open WebUI on an Ubuntu 24.04 LTS operating system. At the end, you will be able to run your 'local ChatGPT' within your home network.
Installation
LM Studio
-
Go to https://lmstudio.ai and download LM Studio for Linux.
-
Rename the downloaded file to
LM-Studio.AppImage. -
Right-click on the file
LM-Studio.AppImageand click on properties. Turn on 'Executable as Program'. -
Open
LM-Studio.AppImageby double-clicking the file. -
Click on the 'Discover' button 🔍 and download, for example, 'gemma 3 4b'.
-
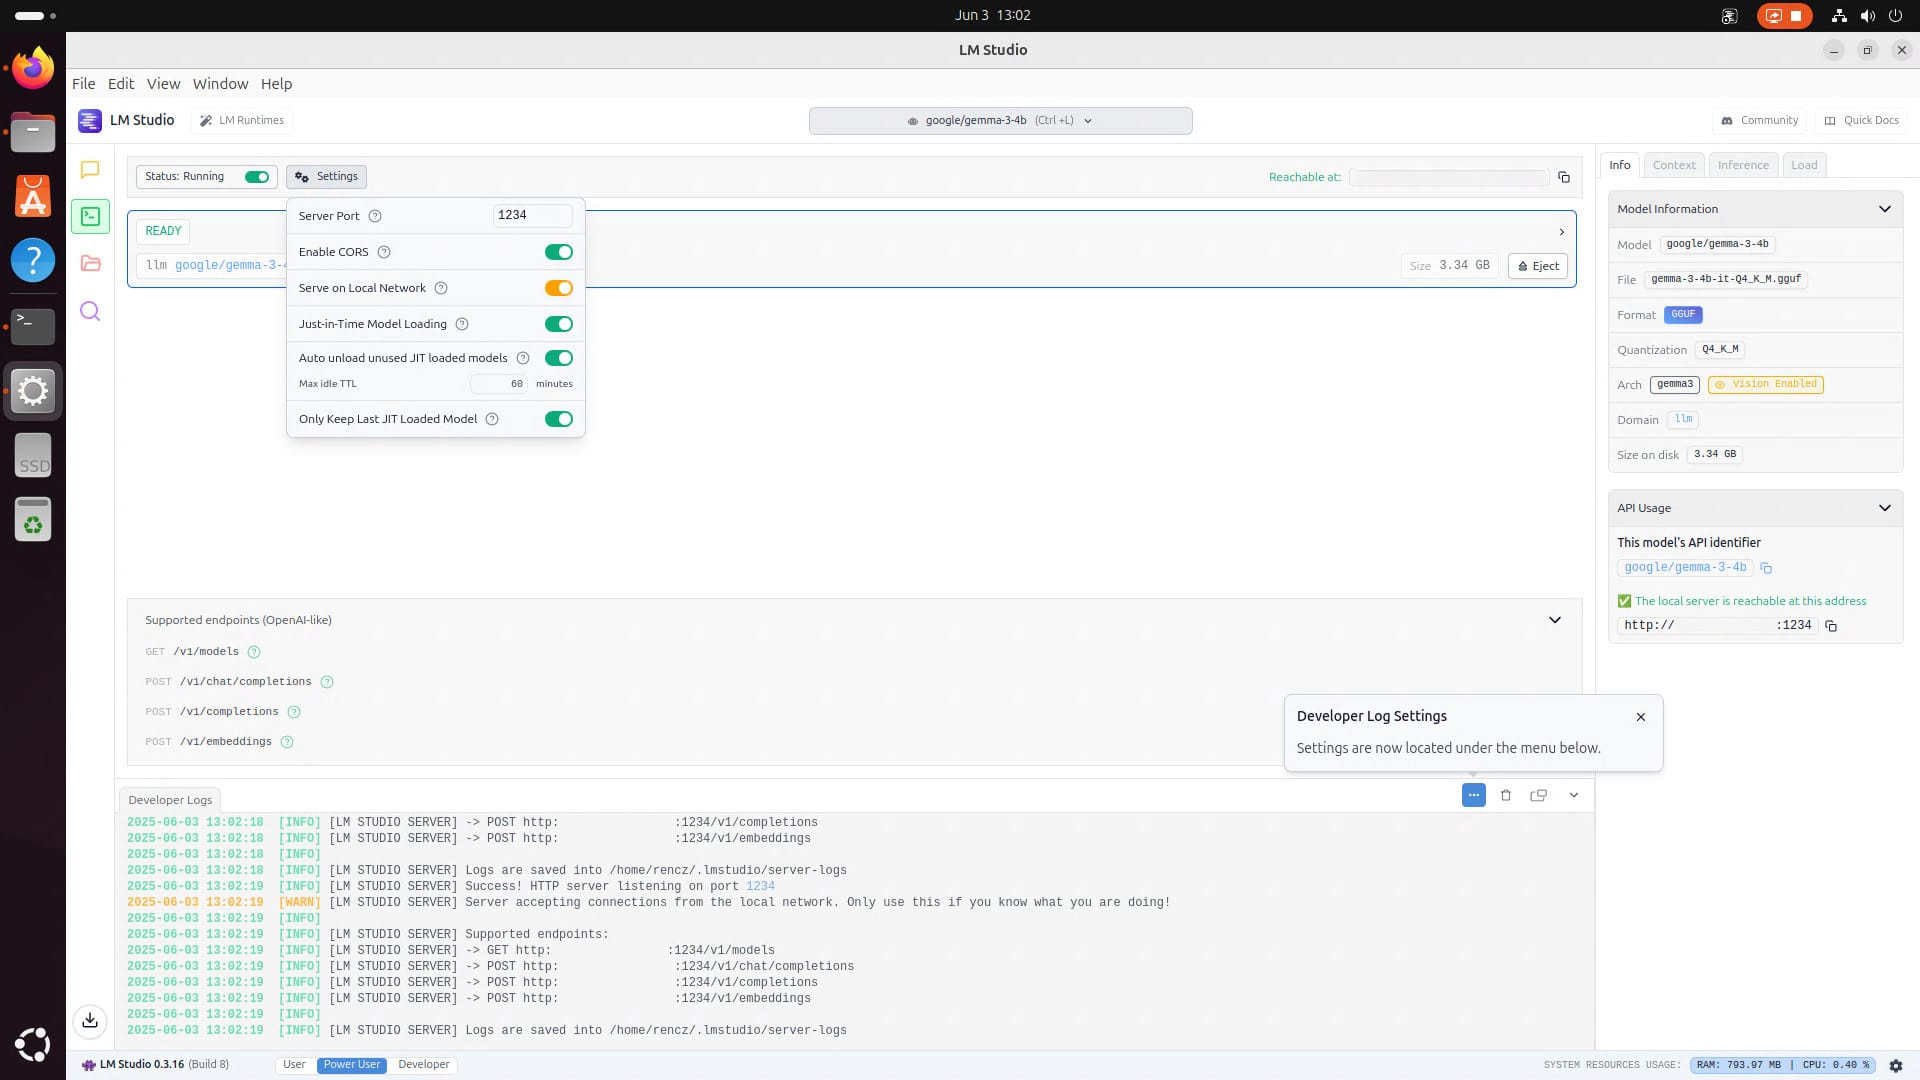
Now click on the 'Developer' button and click the toggle on the right of 'Status: Stopped'. Then click on 'Settings' and enable CORS and serve on the Local Network.
Open WebUI
Make sure Python 3.11 and a Python 3.11 virtual environment are installed, or use this instruction to install Python 3.11.
- Open a terminal by pressing the Windows button. Then type ‘cmd’ and press Enter. Go to the home directory of the logged user:
cd ~
- Clone the repository of Open WebUI:
git clone https://github.com/open-webui/open-webui
- Change directory to
open-webui:
cd open-webui
- Create a Python 3.11 virtual environment:
python3.11 -m venv venv
- Activate the environment:
source venv/bin/activate
- Only for AMD GPU users: Go to pytorch.org and scroll down to 'Install PyTorch'. Select 'Stable', 'Linux', 'Pip', 'Rocm' and run the pip command that is shown on the website:
For example:
pip3 install torch torchvision torchaudio --index-url https://download.pytorch.org/whl/rocm6.3
- Now install the Python packages of Open WebUI:
pip install open-webui
- Run Open WebUI:
open-webui serve
- Open a browser and go to http://localhost:8080/ and create an admin account.

-
Now click on the hamburger menu in the upper left corner. Then click on your username in the lower left corner and click on 'Settings'.
-
Click on 'Connections' and hit the '+'. Now add the following connection:
-
URL:
<LM-Studio-API>/v1 -
Key:
just-add-something- The
<LM-Studio-API>URL can be found in the 'Developer' tab of LM Studio on the right at API usage. Copy that link and add/v1to the end of the URL.
- The
-
-
Click 'Save' and click the 'X'.
-
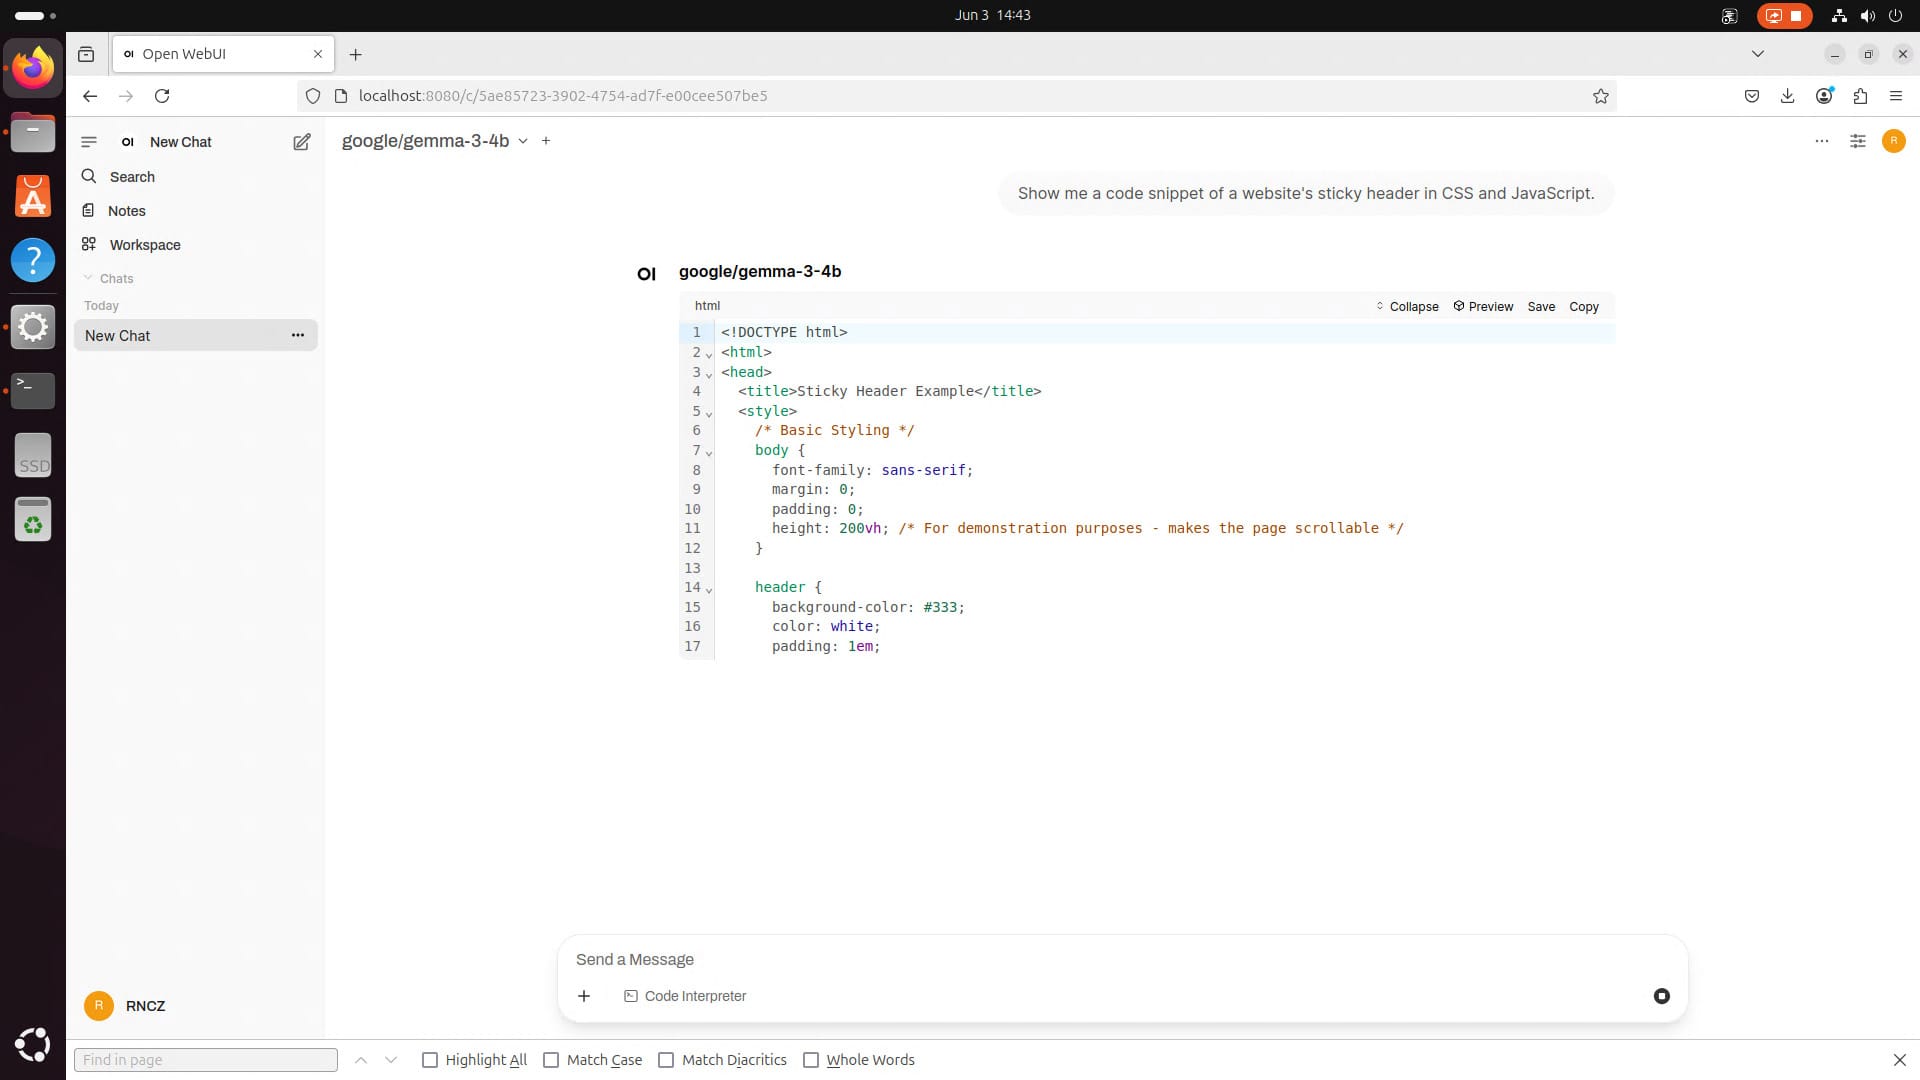
In the top, click on 'Select a model' and select the downloaded model. You can now ask questions to the model. Open WebUI is running locally on the Ubuntu PC right now.
If there is a device that is on the same home network as the Ubuntu PC with LM Studio and Open WebUI, it is possible to open Open WebUI in the browser. Enter the <LM-Studio-API> URL in the browser and change the port 1234 to 8080. Open WebUI will be loaded.
If you want to know how to launch LM Studio and Open WebUI automatically at startup of your PC, then take a look here.
Member discussion