
PyTorch + ROCm + Windows 11

After looking around on the internet to see if there is some new stuff going on in AI and AMD, I came across an issue on the ROCm Git repository to run the ROCm version of PyTorch on Windows. First of all, a big shoutout to the user jammm (Aaryaman Vasishta) that replied on this issue, because this was the moment to try to get PyTorch working in Windows with an AMD GPU. And I can say, I get pretty good results! Keep reading if you want to know how to run PyTorch on Windows with an AMD GPU, but keep in mind that this is not an official ROCm version of PyTorch and it is in active development. That said, it is your own responsibility to try this version of PyTorch on your hardware.
The equipment that I use is an AMD RX 7700 XT AMD GPU with 12GB VRAM, an AMD Ryzen 7 5800X 8-Core Processor CPU and 32GB RAM with Windows 11. Once you followed the steps below, you will be able to generate images with text prompts in Fooocus AI by lllyasviel (Lvmin Zhang). Before you start, make sure the AMD drivers are installed on your Windows PC. I use the AMD Adrenaline Edition software too. Let’s get started!
Download and Install Python 3.11
First of all, download and install Python 3.11 (64-bit Windows Installer) on your PC from this link.
After the installation is complete, open a command prompt. You can do this by pressing the Windows button, then type ‘cmd’ and the command prompt will be visible. Press enter or click on ‘command prompt’.
Check the installed version with the following command:
python --version
If the output is a different version than Python 3.11.x, then you can use the python launcher. Enter the following in the command prompt:
py -3.11 --version
Now you should get an output that prints something like Python 3.11.x.
Python 3.11 Virtual Environment
Open a new command prompt (Windows button, type ‘cmd’ and press enter) and run the following command:
cd %HOMEPATH%
Now you are in the home directory in the command prompt. Create the following directory:
mkdir ai-venv
Change the directory into the ai-venv folder:
cd ai-venv
Create a virtual environment:
py -3.11 -m venv venv
If you have only one Python version installed, then you can also run the command python -m venv venv. As long as the venv folder is created in the ai-venv directory, you are moving in the right direction.
Now activate the virtual environment:
.\venv\Scripts\activate
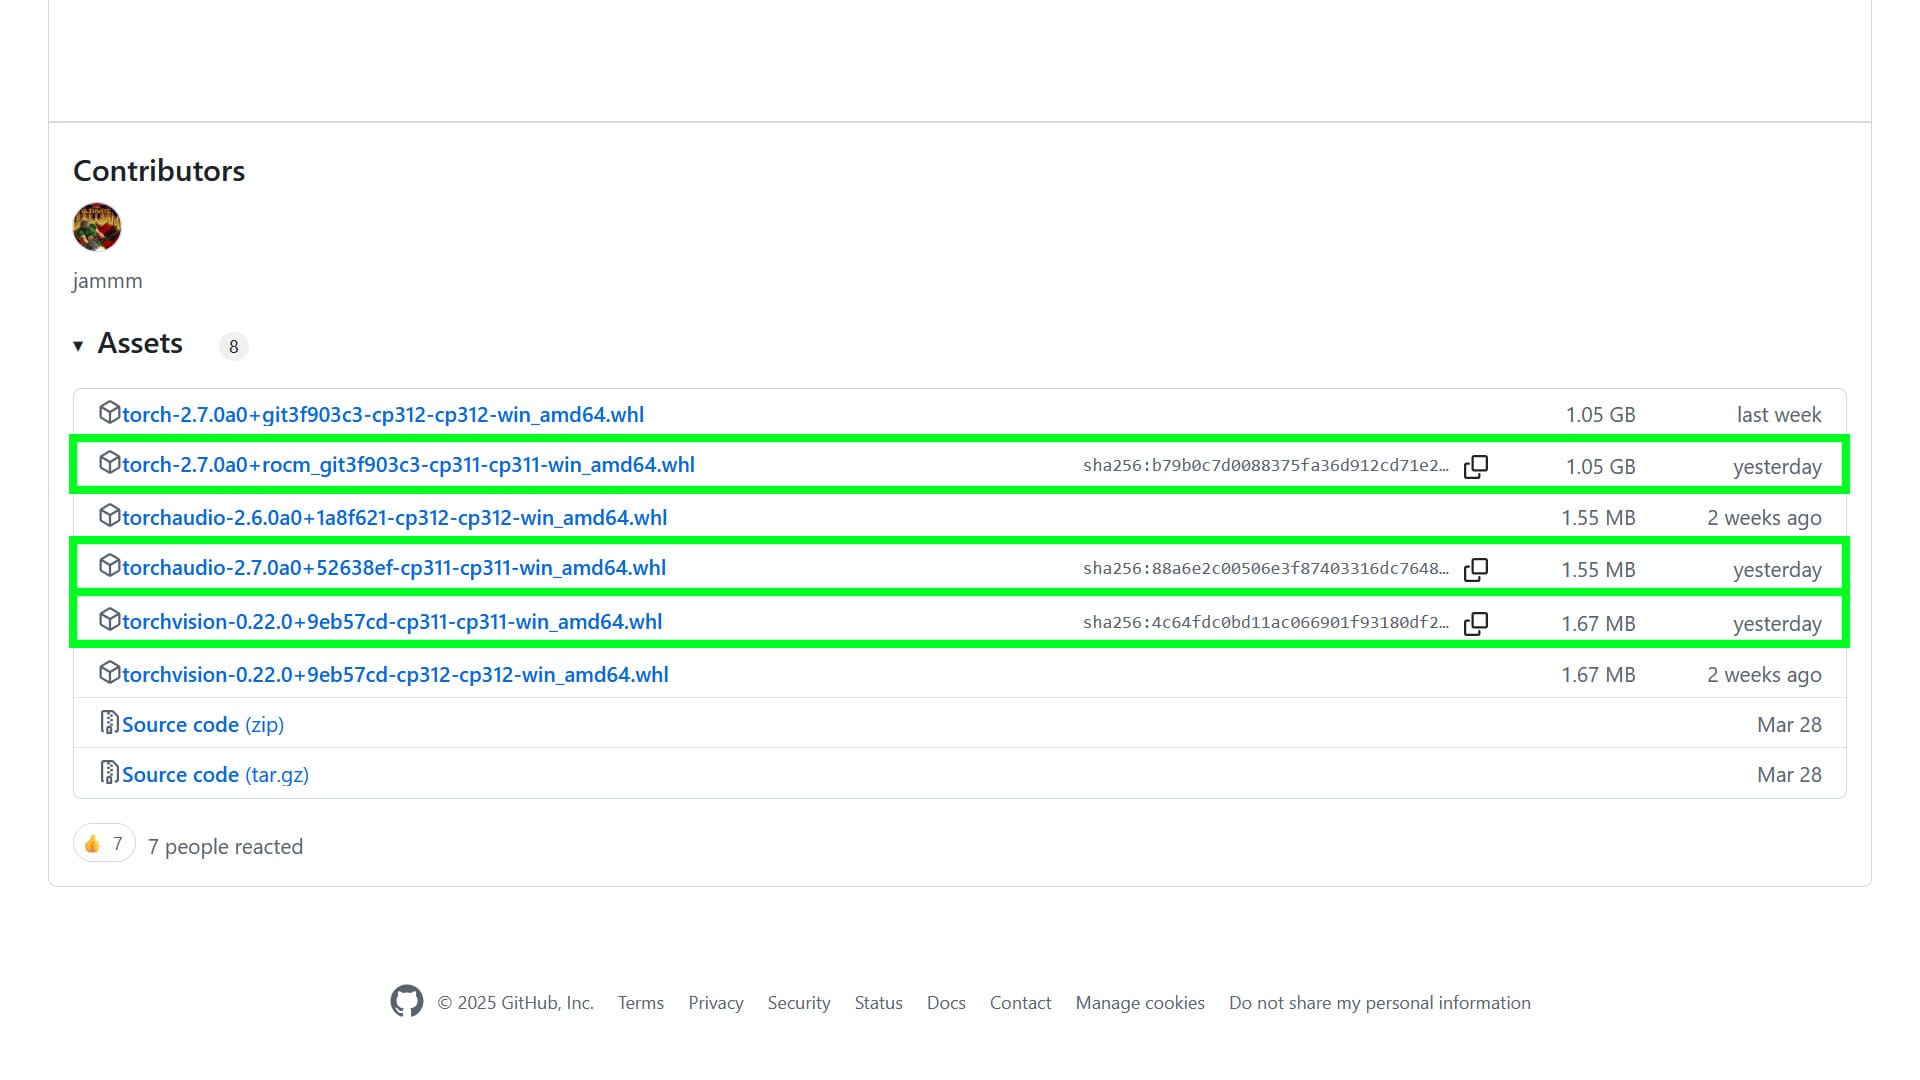
Download the ROCm PyTorch Files for Windows
Download the following 3 wheel files from this repository called rocm-TheRock. This is a forked repository by user scottt. The official repository is made by ROCm. Place the files into the ai-venv folder.
- torch-2.7.0a0+rocm_git3f903c3-cp311-cp311-win_amd64.whl
- torchaudio-2.7.0a0+52638ef-cp311-cp311-win_amd64.whl
- torchvision-0.22.0+9eb57cd-cp311-cp311-win_amd64.whl
Install the ROCm PyTorch Files with Pip
Go back to the command prompt and make sure you are in the ai-venv directory.
cd %HOMEPATH%\ai-venv
Make sure that you see (venv) on the left of the command line. Otherwise, go back to the step of the Python 3.11 virtual environment.
Install the pip packages:
- Torch:
pip install "torch-2.7.0a0+rocm_git3f903c3-cp311-cp311-win_amd64.whl" - Torch Audio:
pip install "torchaudio-2.7.0a0+52638ef-cp311-cp311-win_amd64.whl" - Torch Vision:
pip install "torchvision-0.22.0+9eb57cd-cp311-cp311-win_amd64.whl"
Download and Install Fooocus
Open a new command prompt:
cd %HOMEPATH%
Now it is time to download the software to generate images by text prompts. Make sure you got GIT SCM installed. So, download the Fooocus repository from Git or run the following command:
git clone https://github.com/lllyasviel/Fooocus
Copy the venv folder you made in ai-venv to the Fooocus folder:
xcopy "%HOMEPATH%\ai-venv" "%HOMEPATH%\Fooocus\" /E /I /H /Y
This can take a moment...
Now go into the Fooocus directory:
cd Fooocus
Activate the venv:
.\venv\Scripts\activate
Install the Fooocus required pip packages:
pip install -r requirements_versions.txt
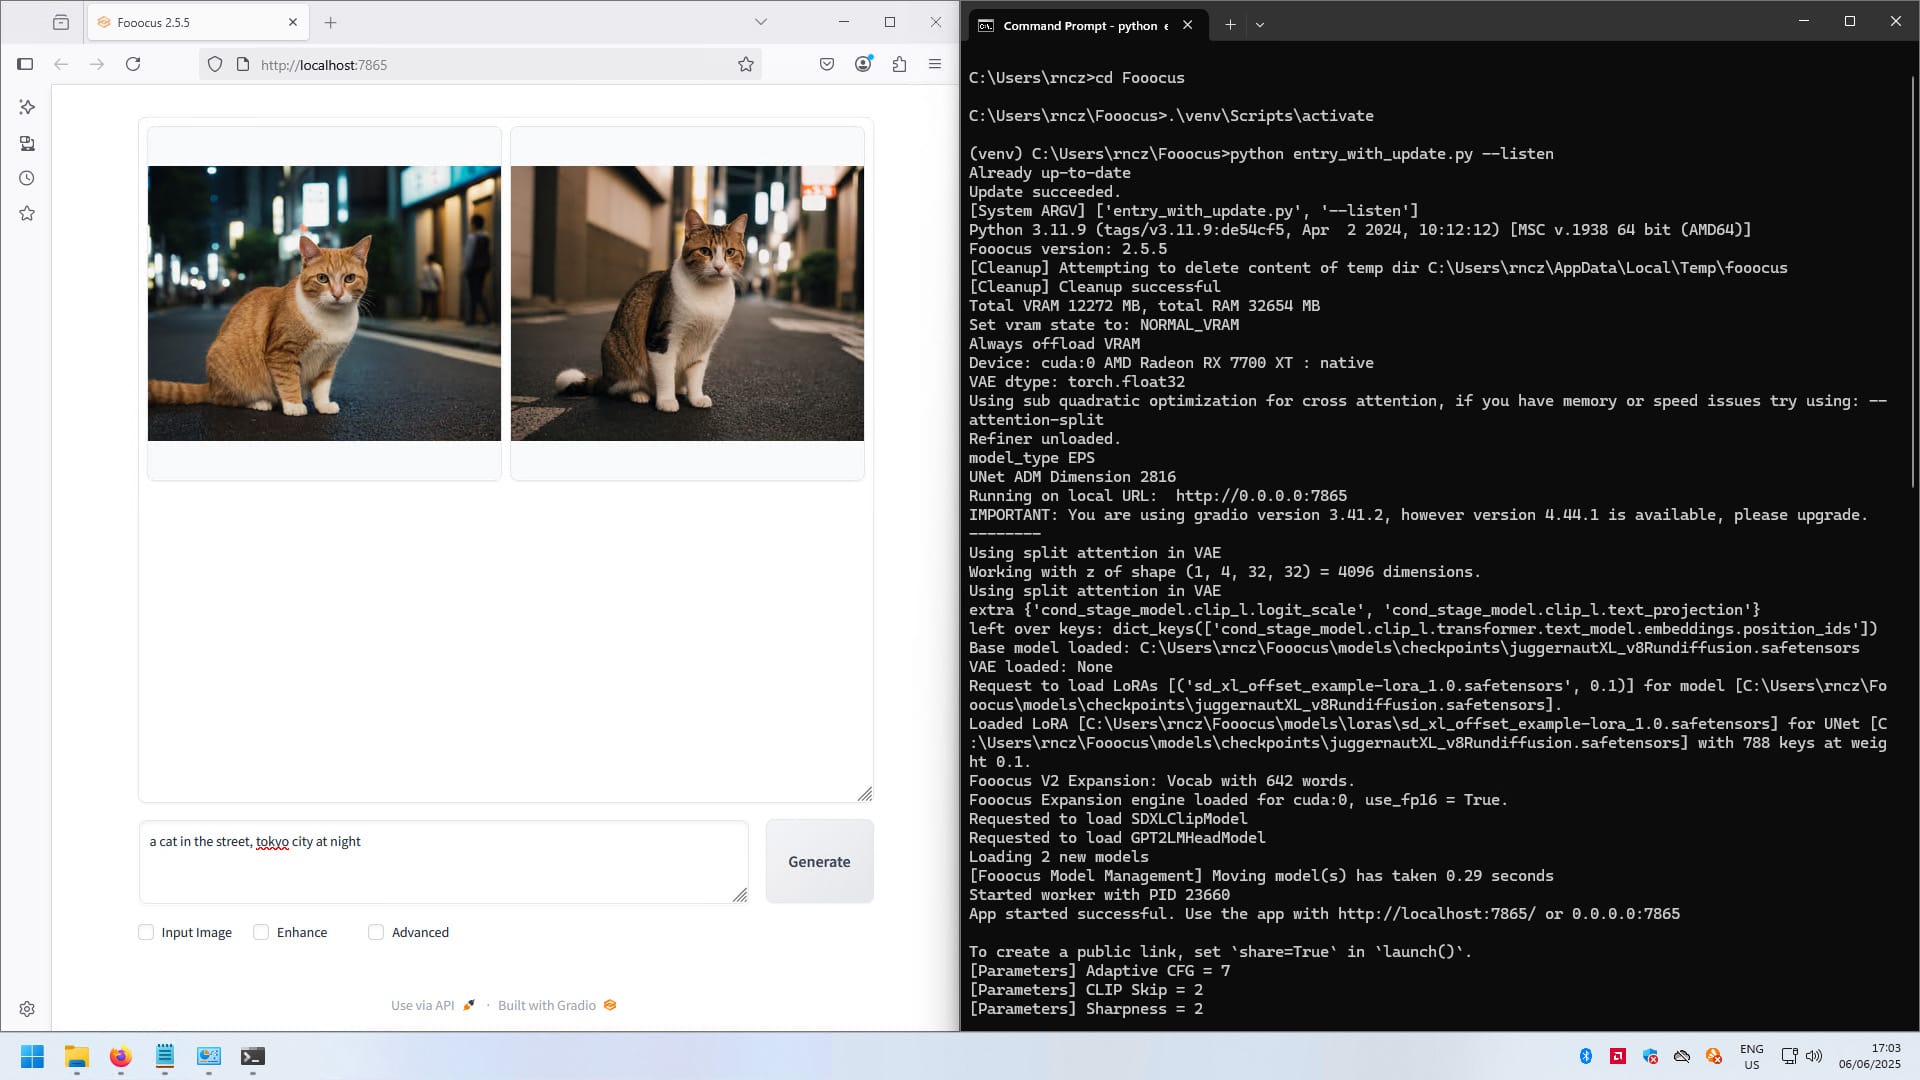
Start Fooocus:
python entry_with_update.py --listen
The following line will be printed in the command prompt:
App started successful. Use the app with http://localhost:7865/ or 0.0.0.0:7865
Now the browser will be opened automatically. If not, just open a browser and go to localhost:8765.
Member discussion